This step-by-step guide shows you how to create a rose from book pages just by folding, cutting and gluing! For the tutorial, I used paper with color on one side and white on the other to make it easy for readers to see fold and fold lines. However, as an avid reader and book lover, I absolutely love the way these look when made with repurposed book pages!
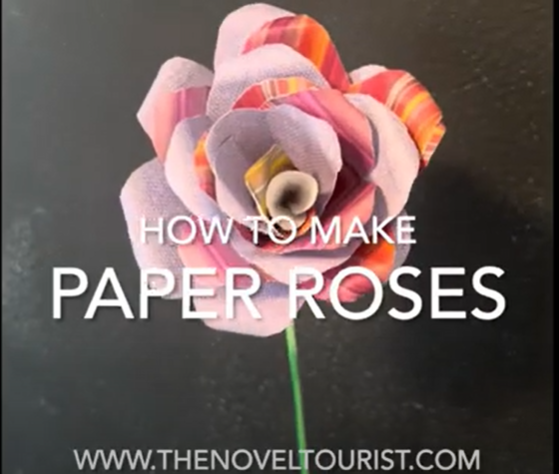
It’s a beautiful way to give new life to old books and keep them out of the landfill. Your finished book page rose will look lovely among its book page flower friends! Mix and match different mediums for unique looks.
Video Tutorial for Book Page Roses
Materials Needed:
- Book pages (any size book)
- Scissors
- Glue
- 12″ BBQ skewer (optional)
- Floral tape (optional)
Step-by-Step Instructions to Make Book Page Roses:

1. Prepare the Squares:
Start with four book pages. When you choose your pages, look for book pages with lots of text on both sides to avoid glaring gaps of white space (unless that’s a look you like, of course!).
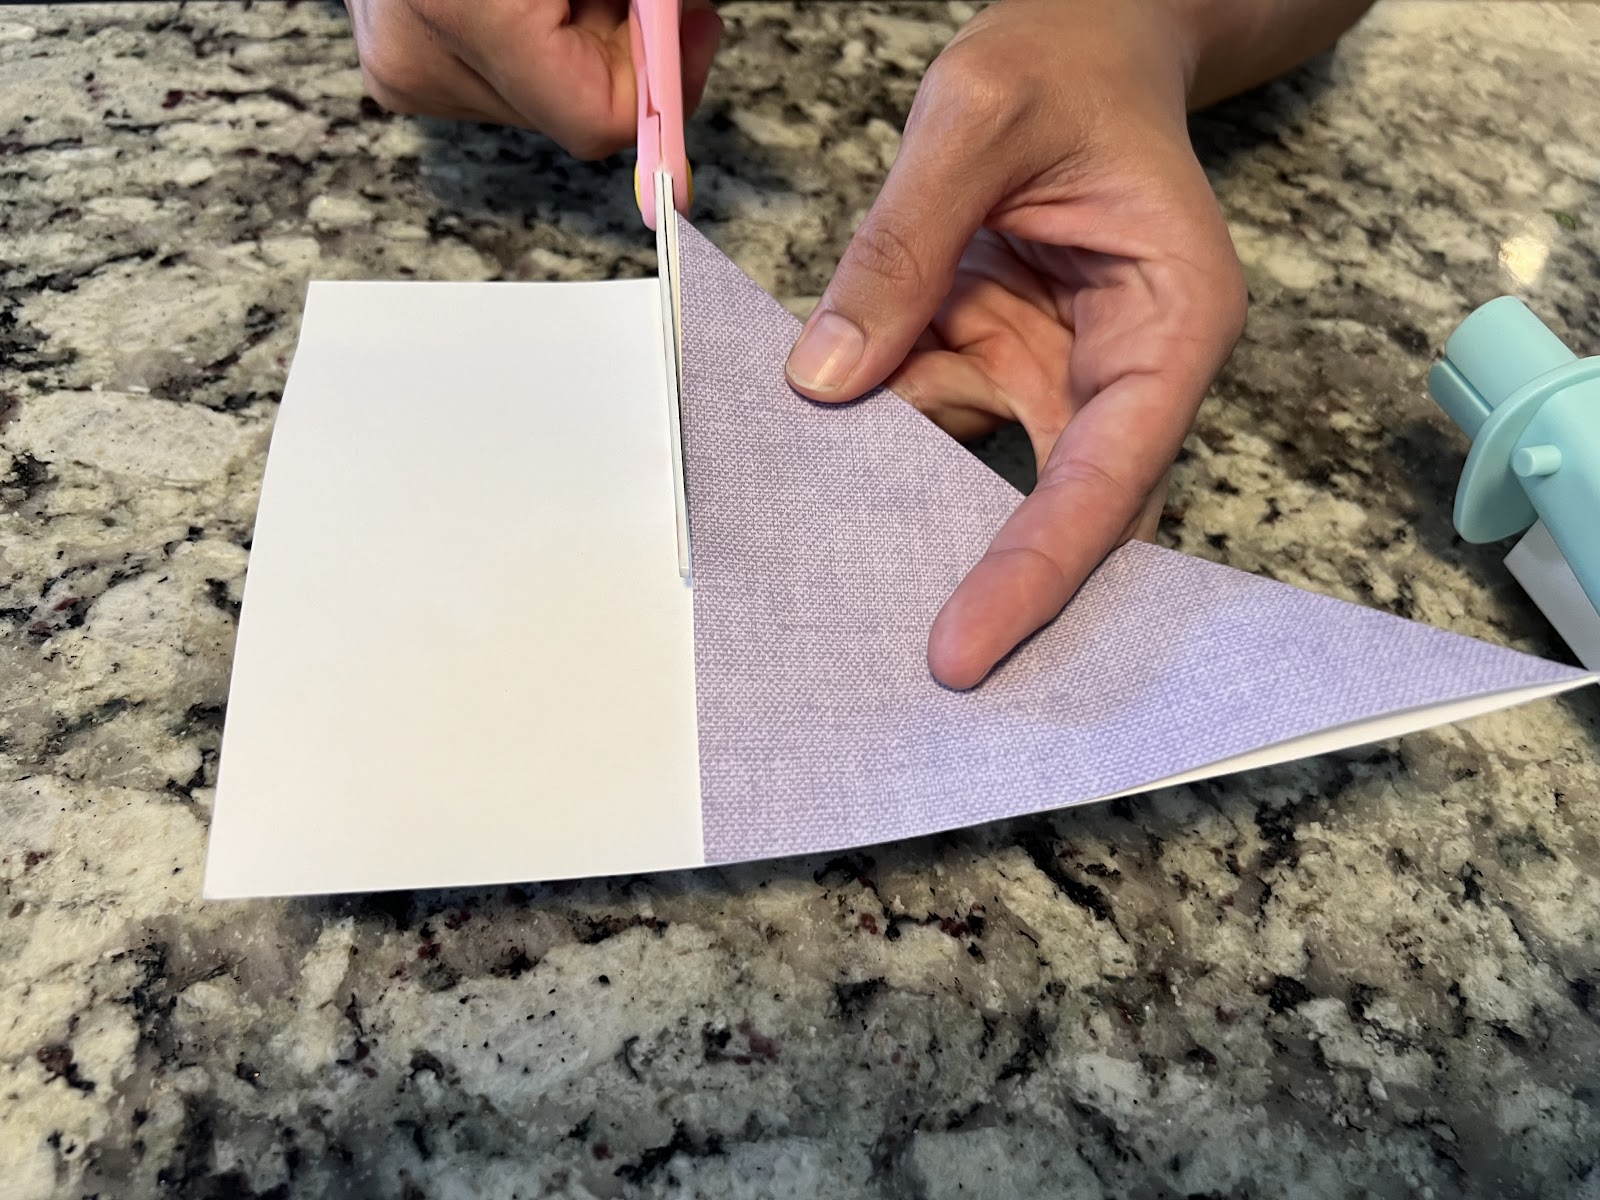
Fold each page from bottom to side to create a triangle. This will result in a perfect square (in the image below the purple triangle is forming the square). Cut the excess paper. The size of the square will determine the size of your flower. These are approximately 5” square, but it’s fun to experiment with different sizes of book pages. Big flowers are very cool!
2. Fold the Squares:
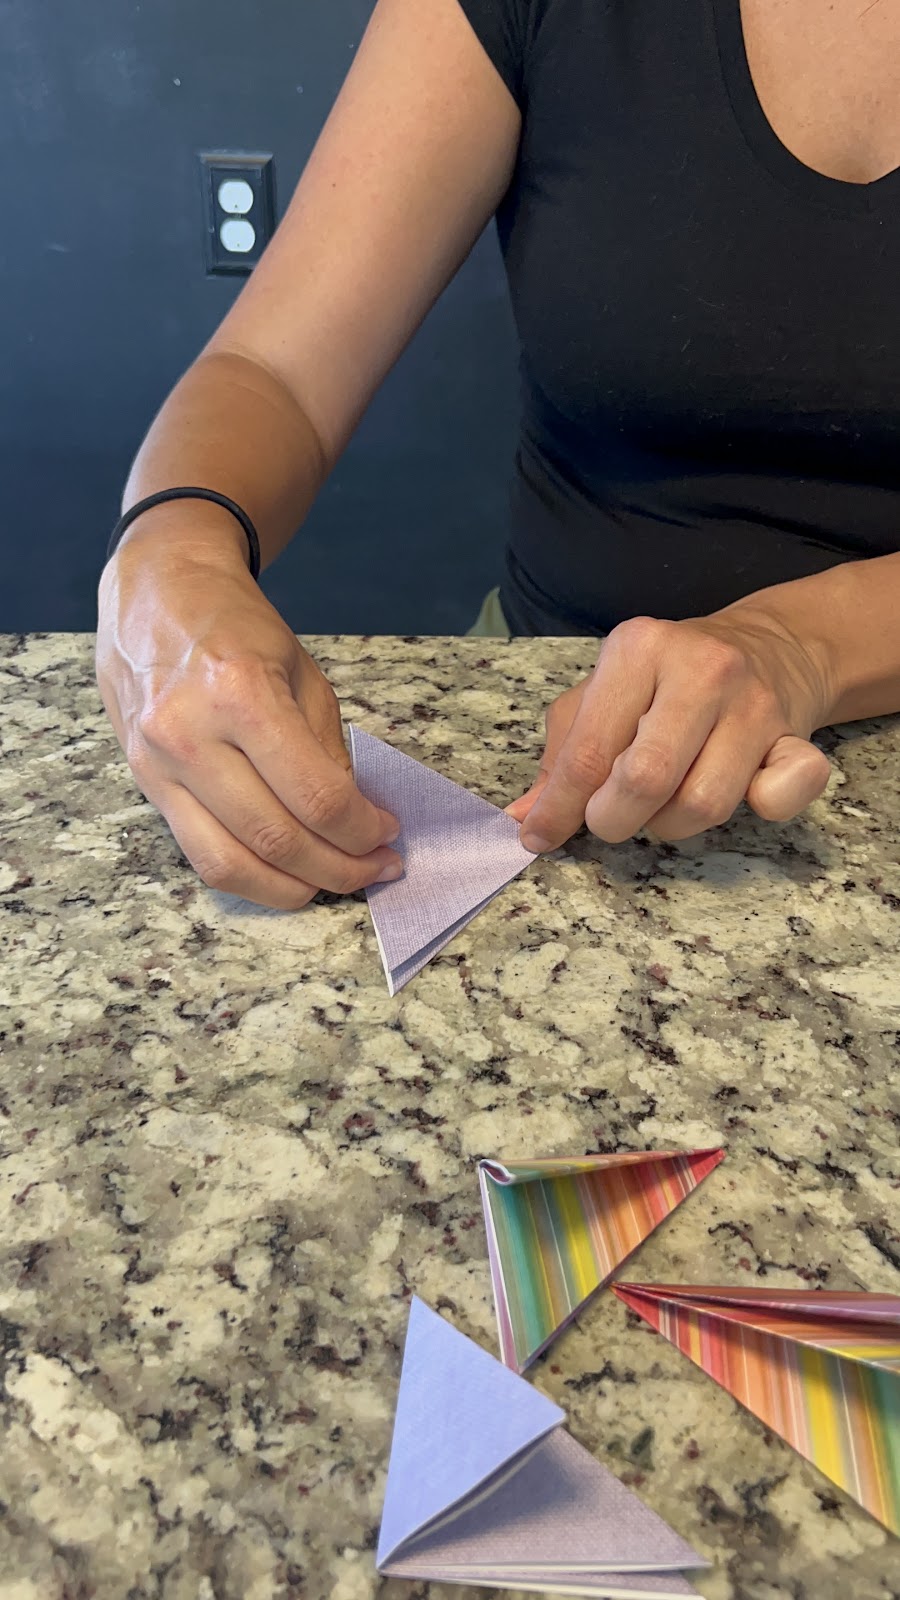
Take one square and fold it in half to form a triangle (it’s the same fold line you already did to create the square to begin with (see image above)).
Fold the triangle in half again to form a smaller triangle. And then do that again one more time!
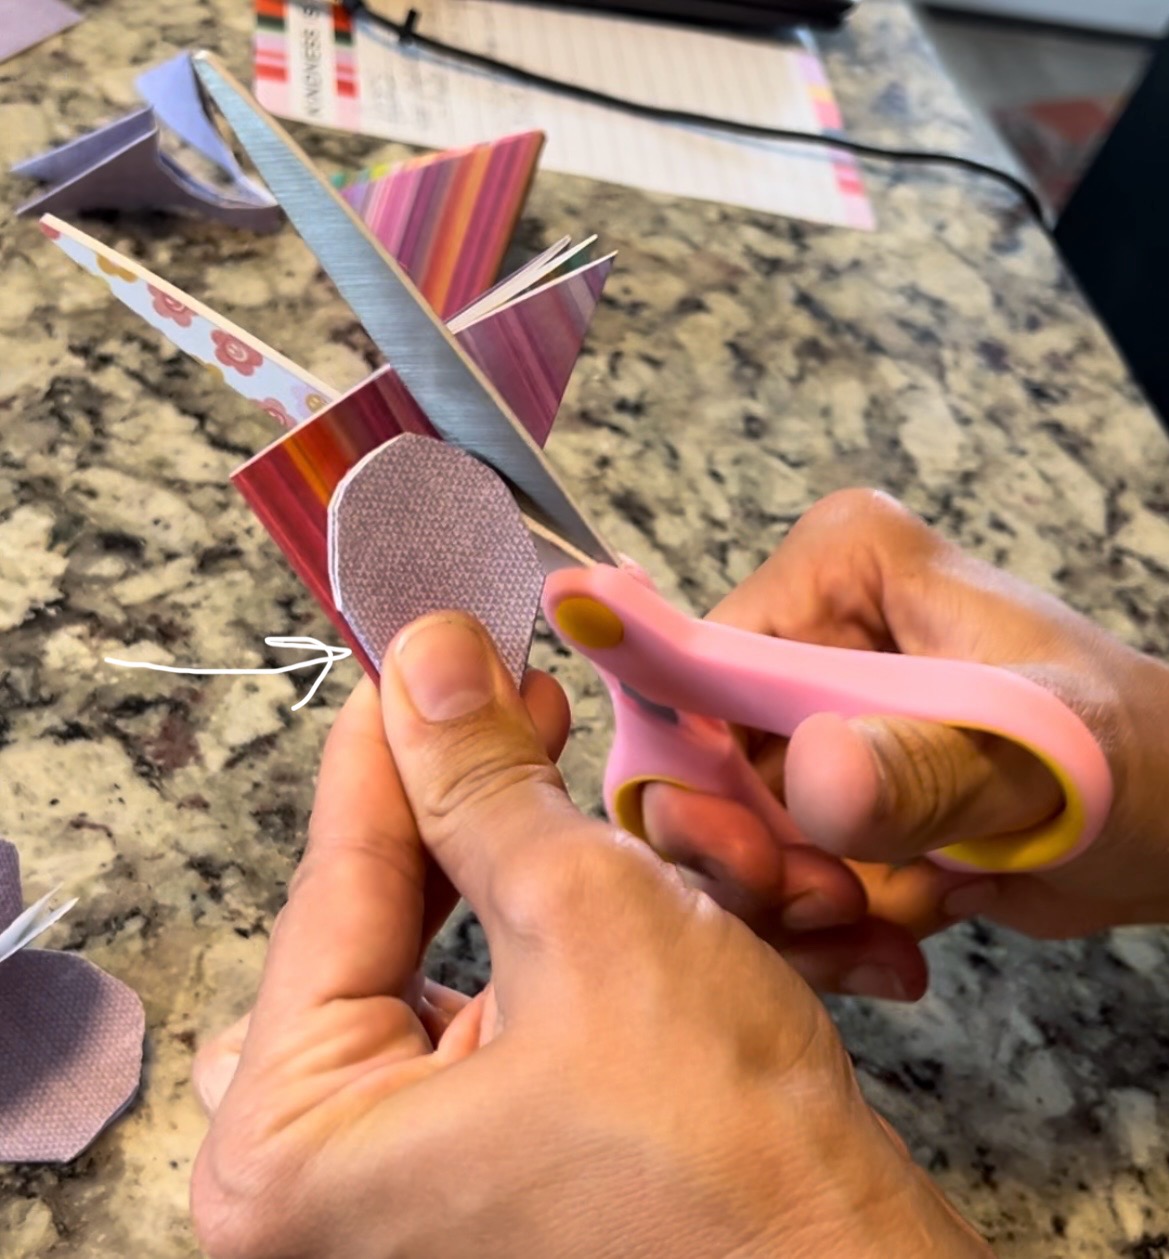
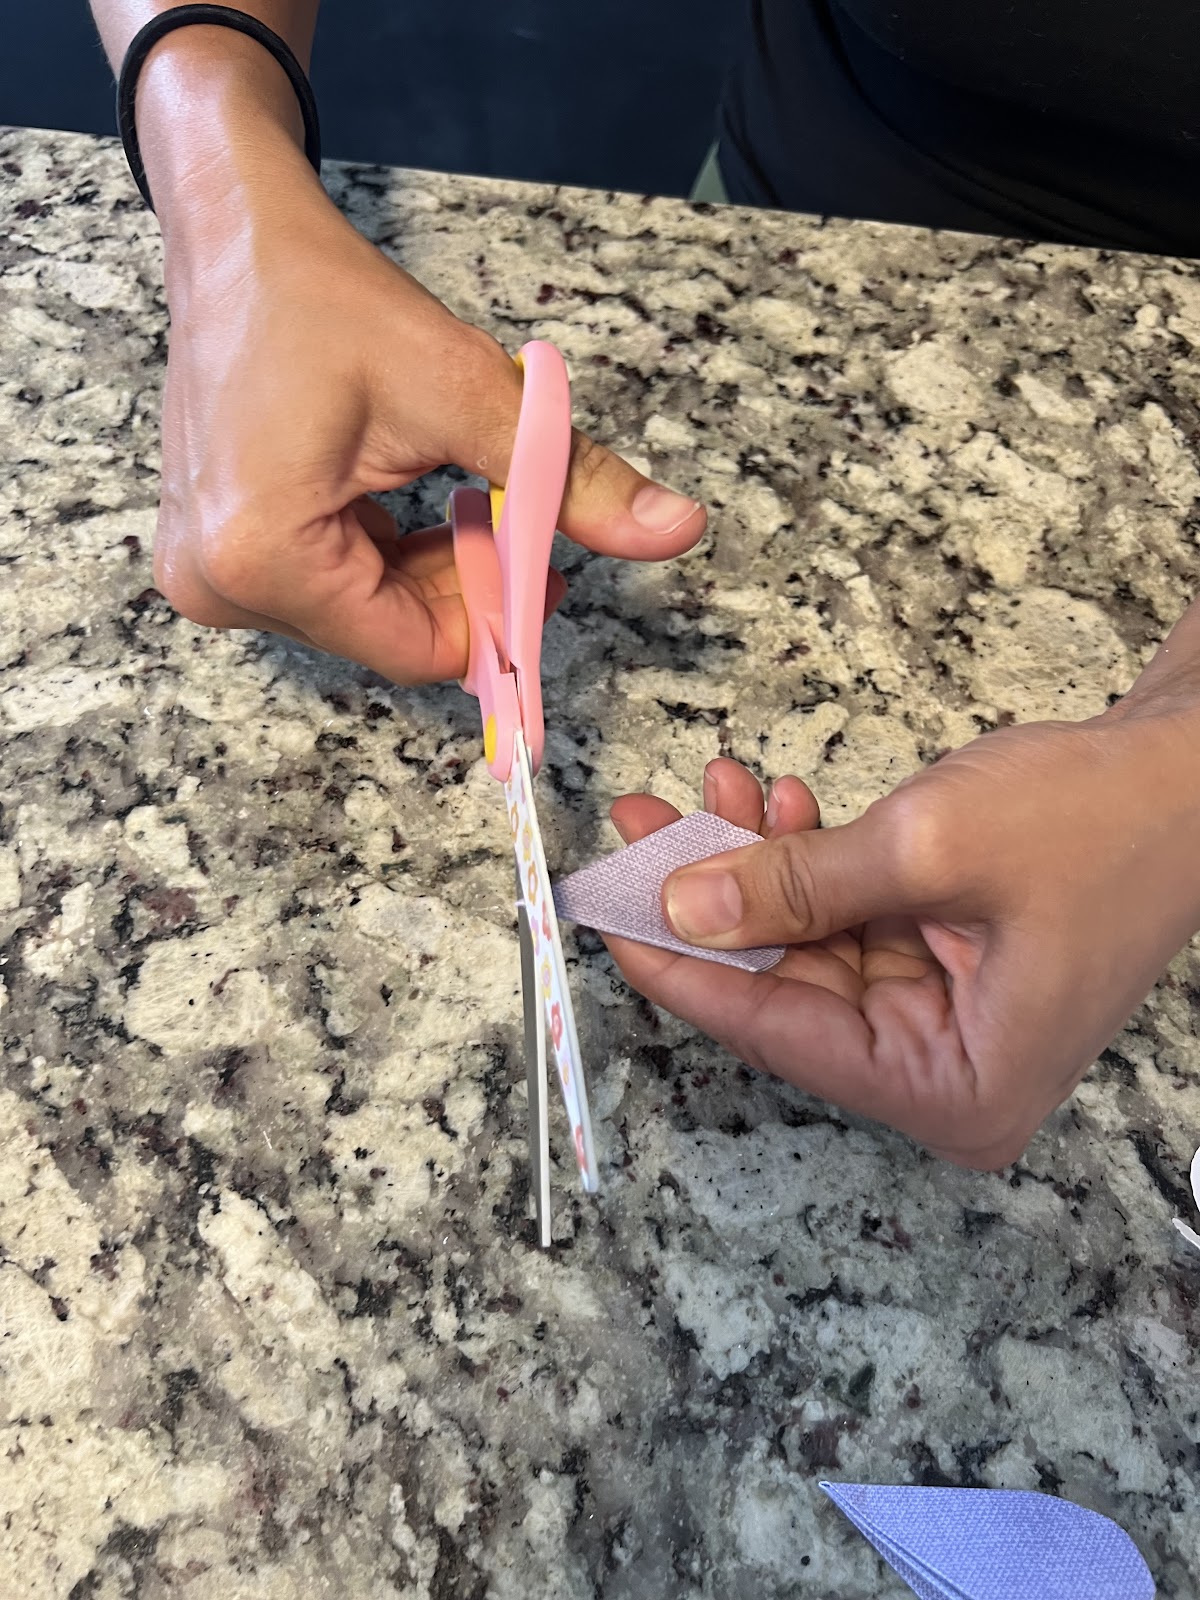
3. Cut the Petal Shape:
Hold the triangle on the folded side (see the arrow?), then cut a rounded edge making the triangle look like a snow cone. Mmmmmm! After you make one, use it as a template so that all your “snow cones” are the same size.
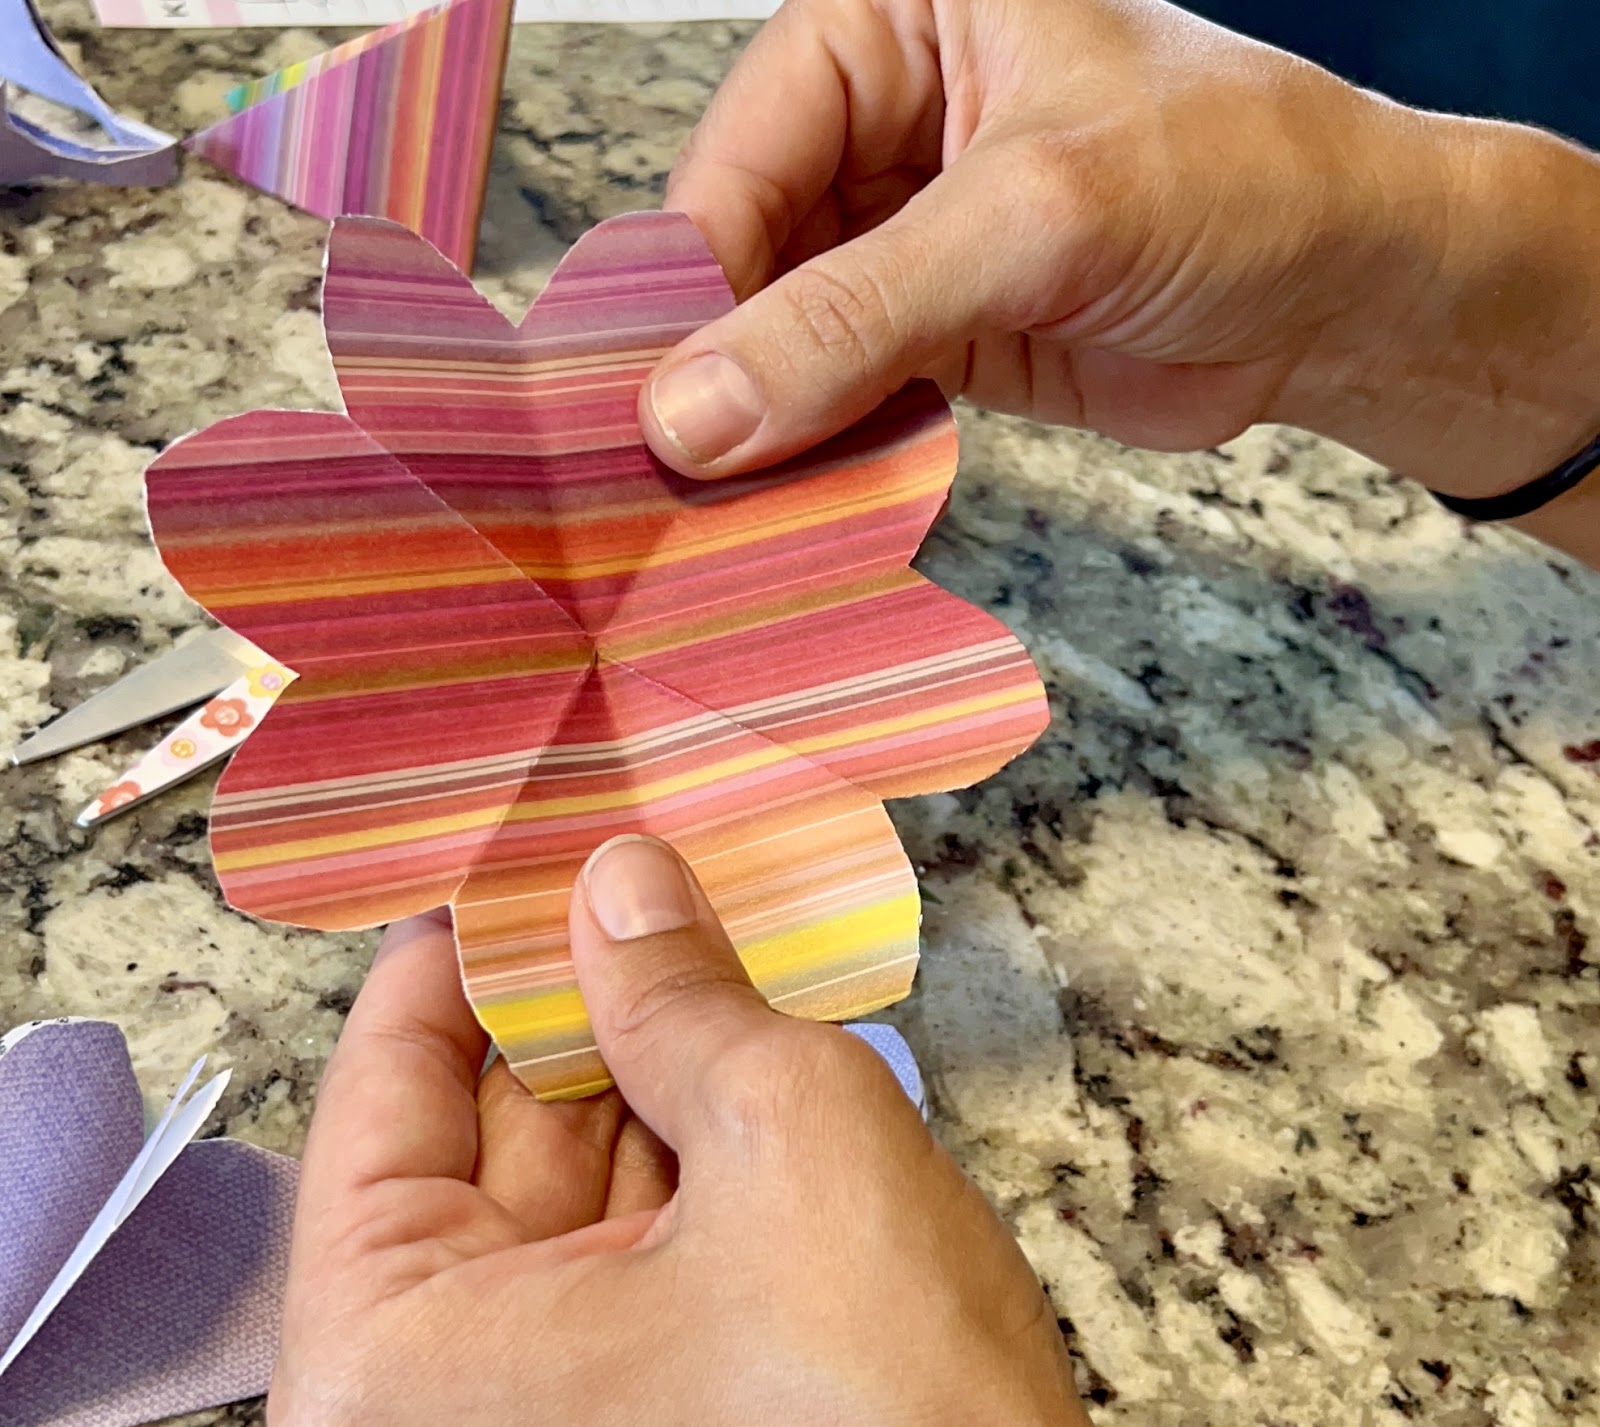
When you open your snow cone, it should look like a flower with several petals. If you don’t like the shape, refold your book page back into a snow cone and then trim it more until you get the shape you want. There’s no perfect shape. Use your imagination to create the book page rose that makes you the happiest!
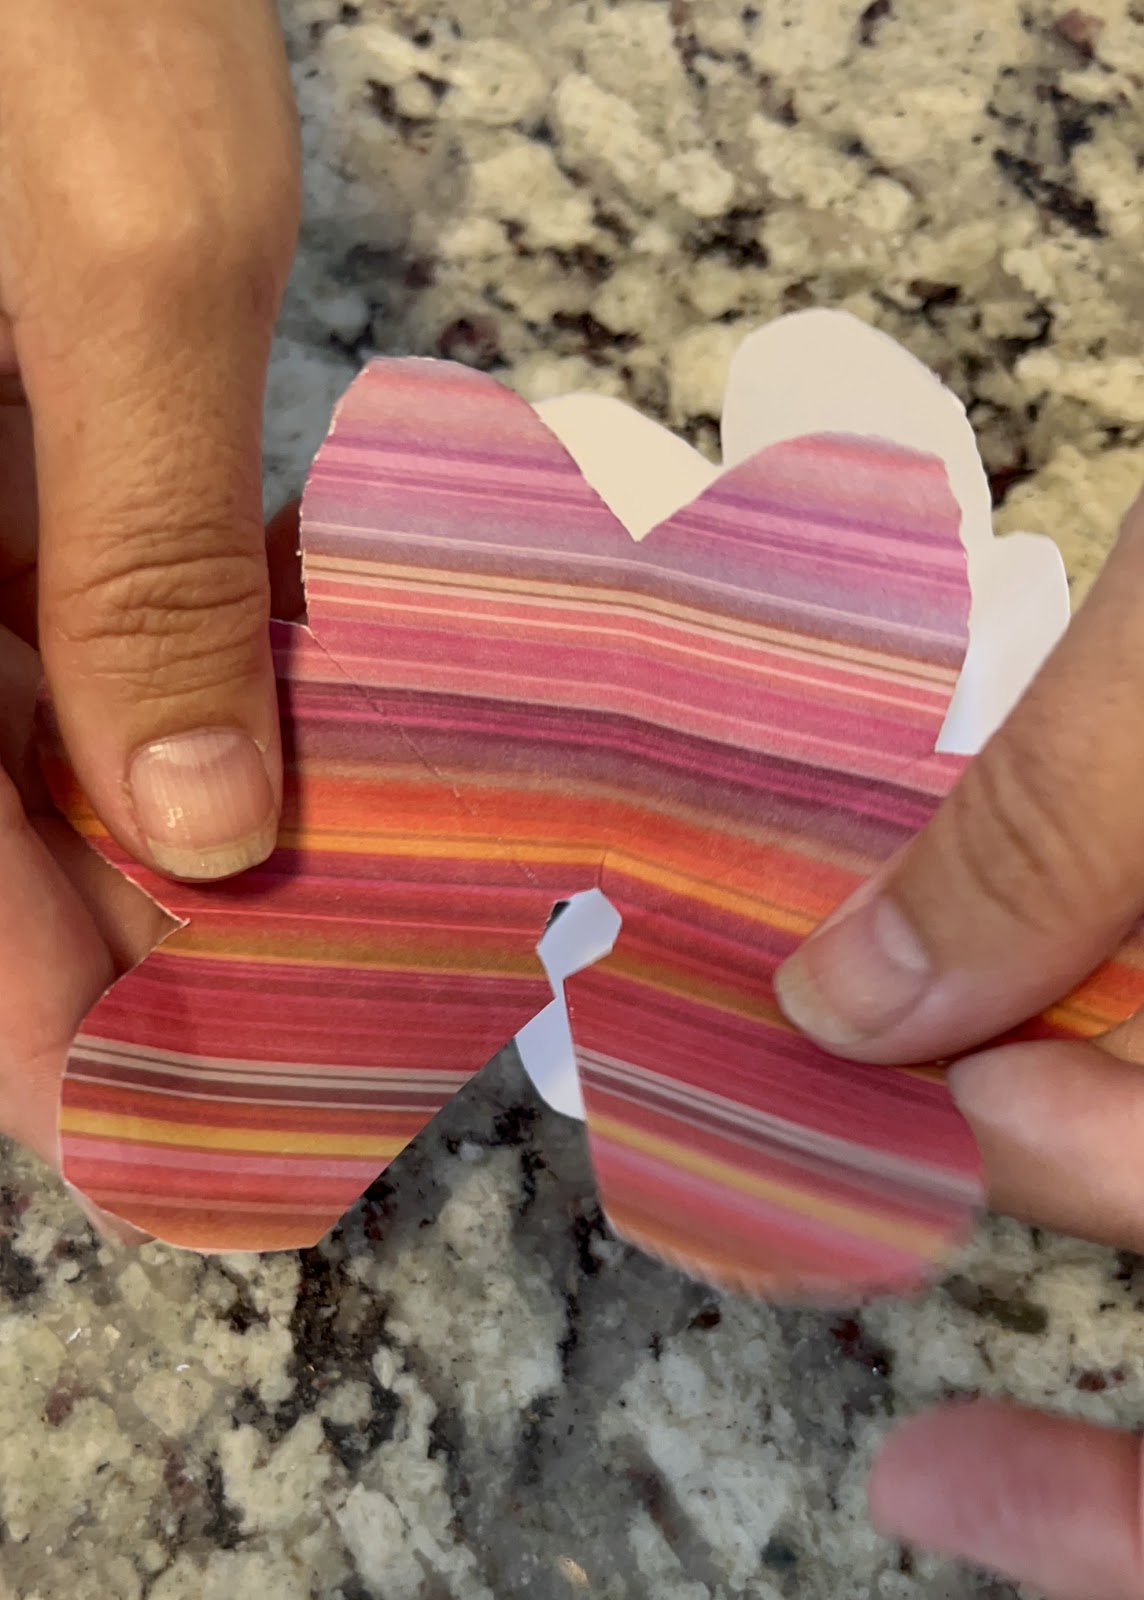
4. Cut a Hole in Center:
Cut off a small amount of the tip. Warning – don’t cut off very much! Just a smidge!
When you open the snow cone, it will look kinda like a daisy! But don’t worry, it will soon become a rose!

5. Create Petal Layers:
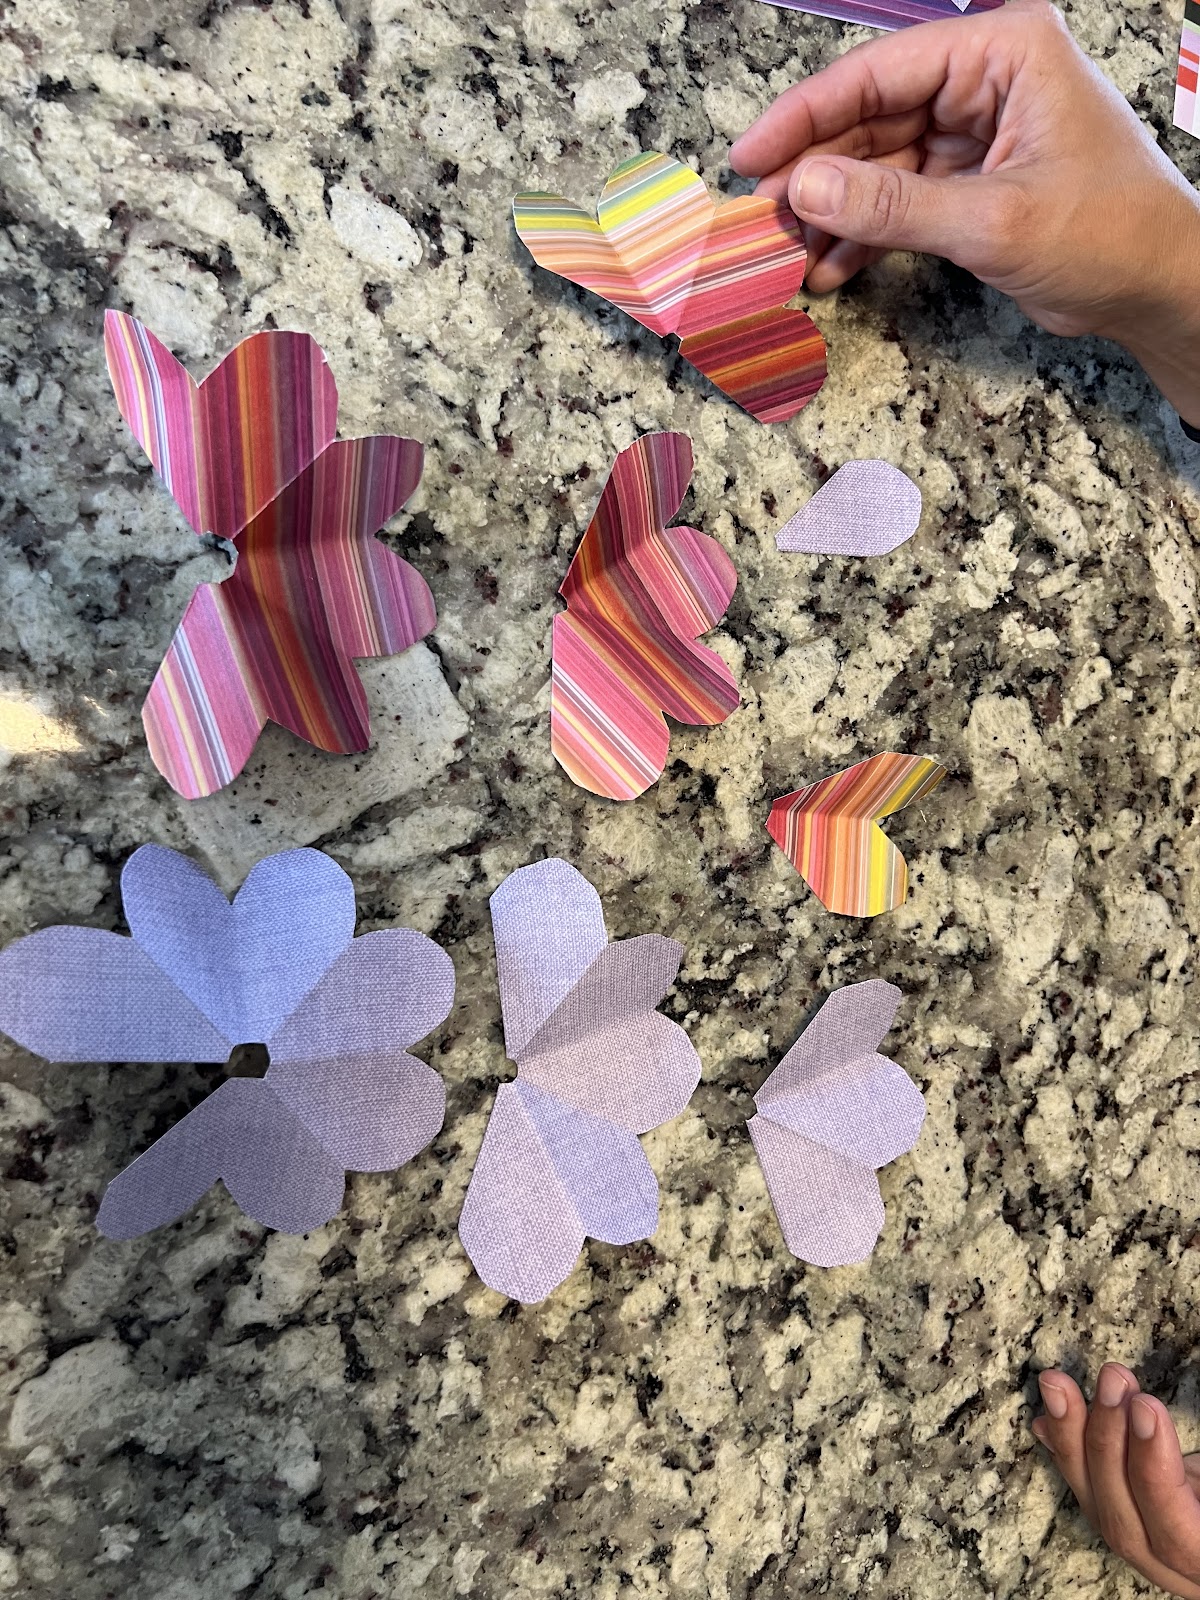
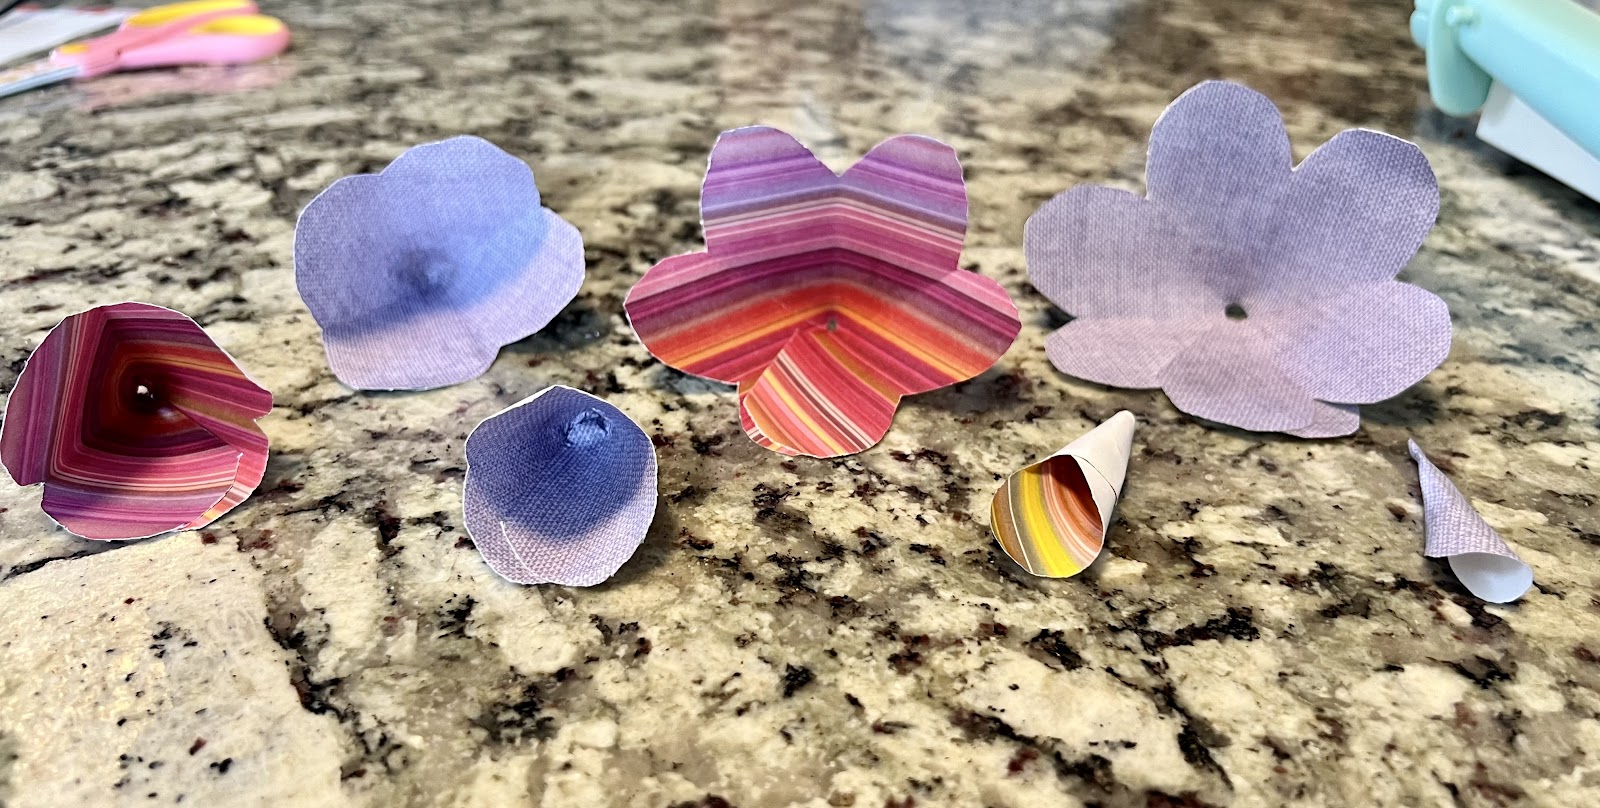
Start with one of your flower cutouts (aka your open snow cone/daisy) and cut out one petal. This will create the base of your rose and also the center of your rose. If you’re going for a certain look, you will want to think carefully about which petals to cut from which snow cone/daisy. Here I cut from every other color so that when I assemble the paper rose, it will be every other color.
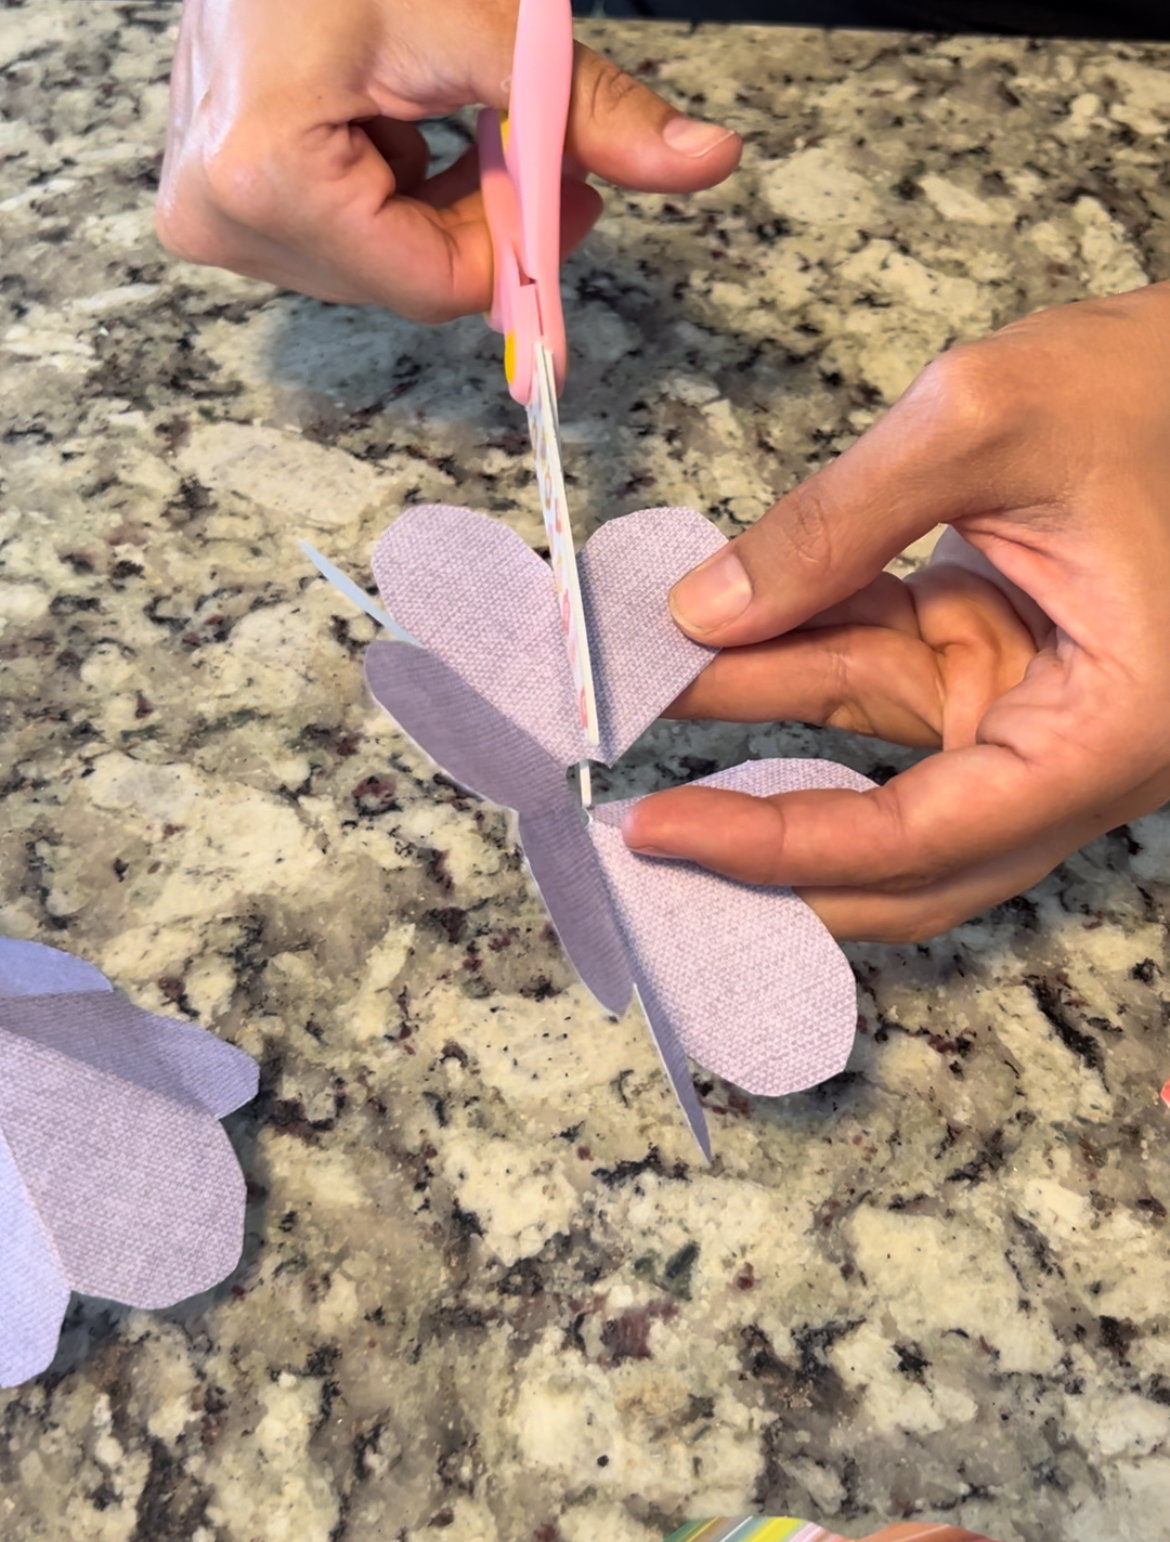
Now do something similar to the other three snow cone daisies except that from the next one cut out two rose petals. And then from the third snow cone daisy cut out three rose petals. Finally, take the fourth snow cone daisy and cut it in half so you have two pieces with four rose petals each. Discard one of the pieces with 4 rose petals. That will leave you with 7 pieces for assembling.
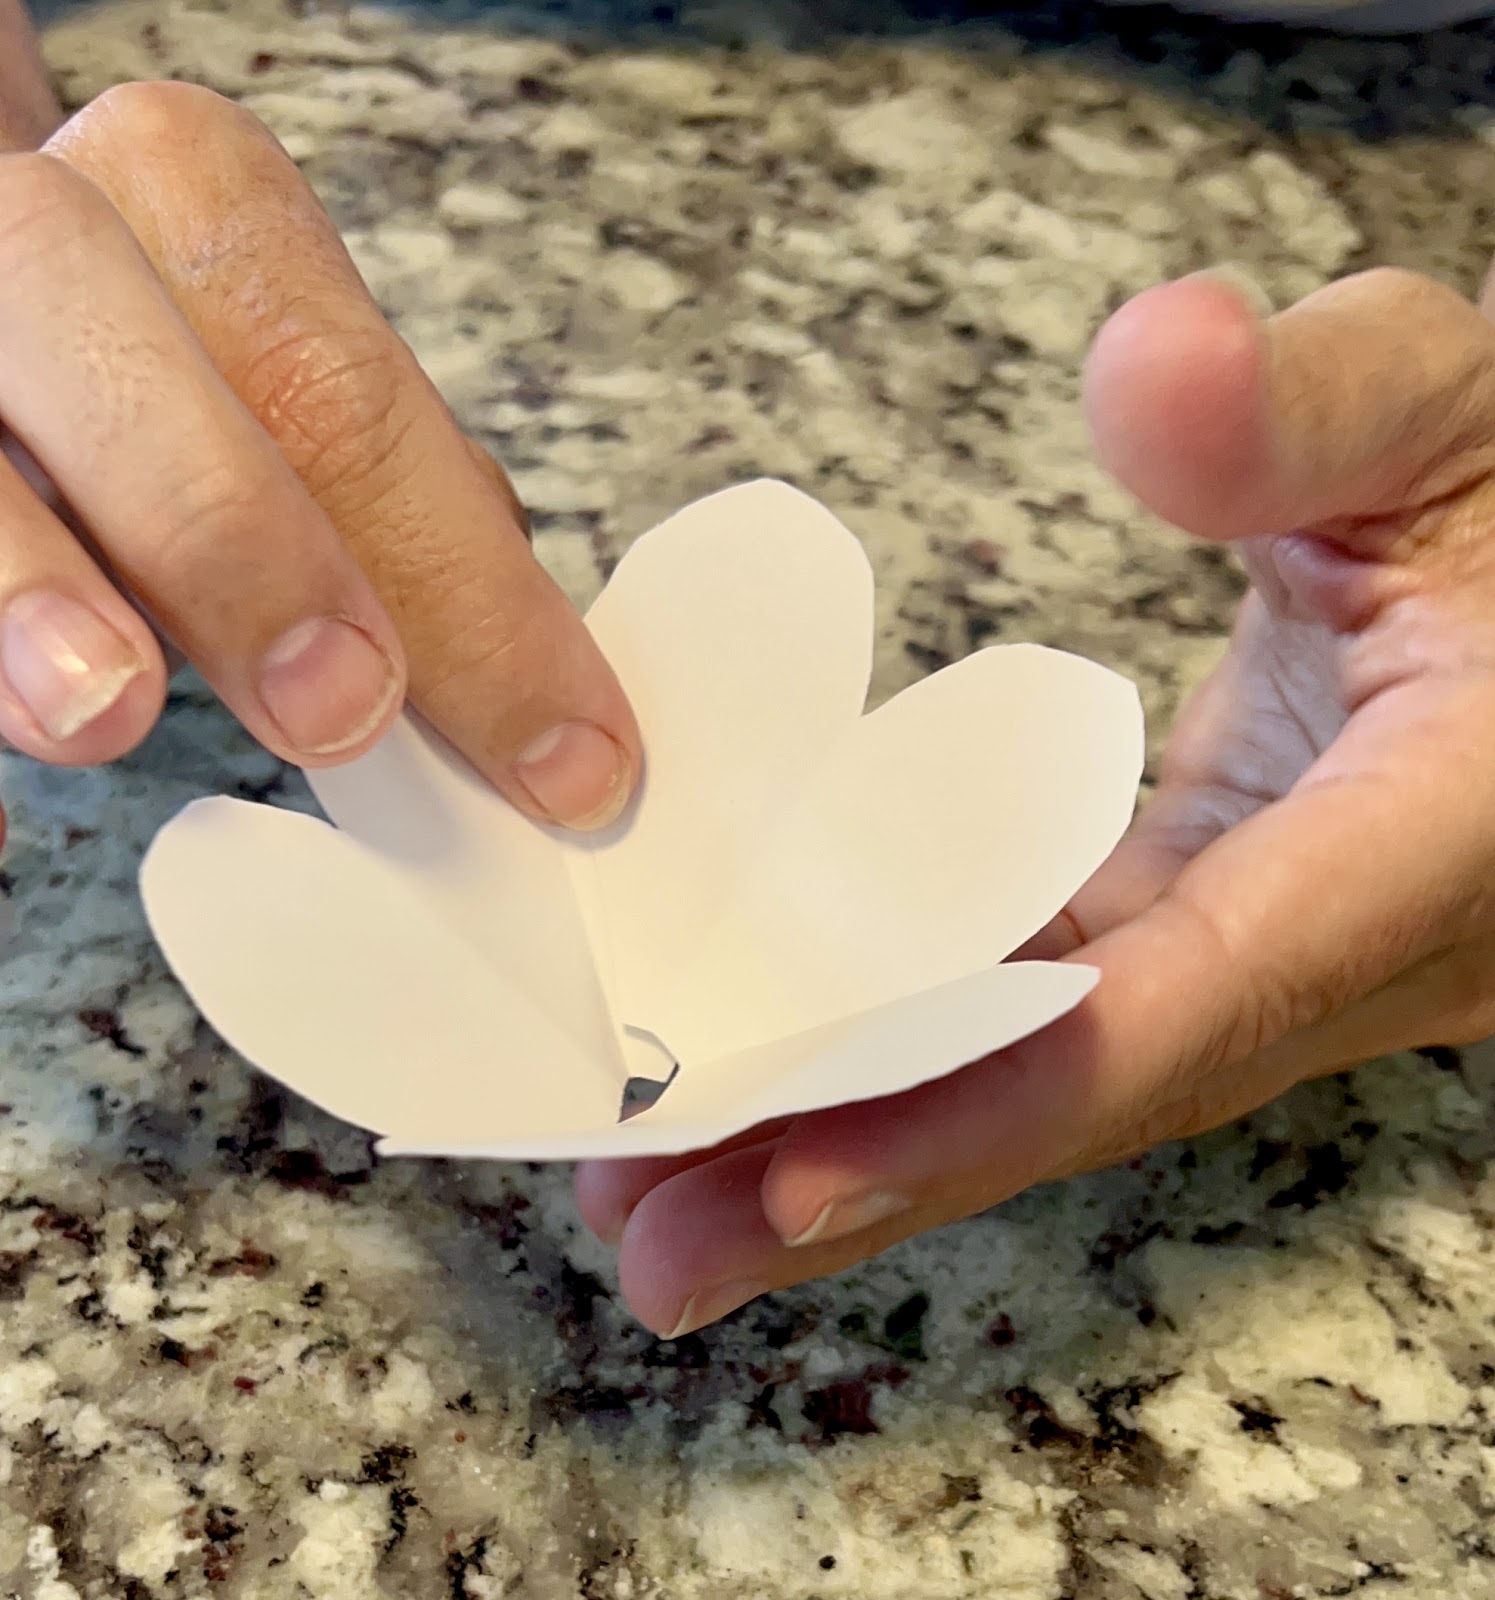
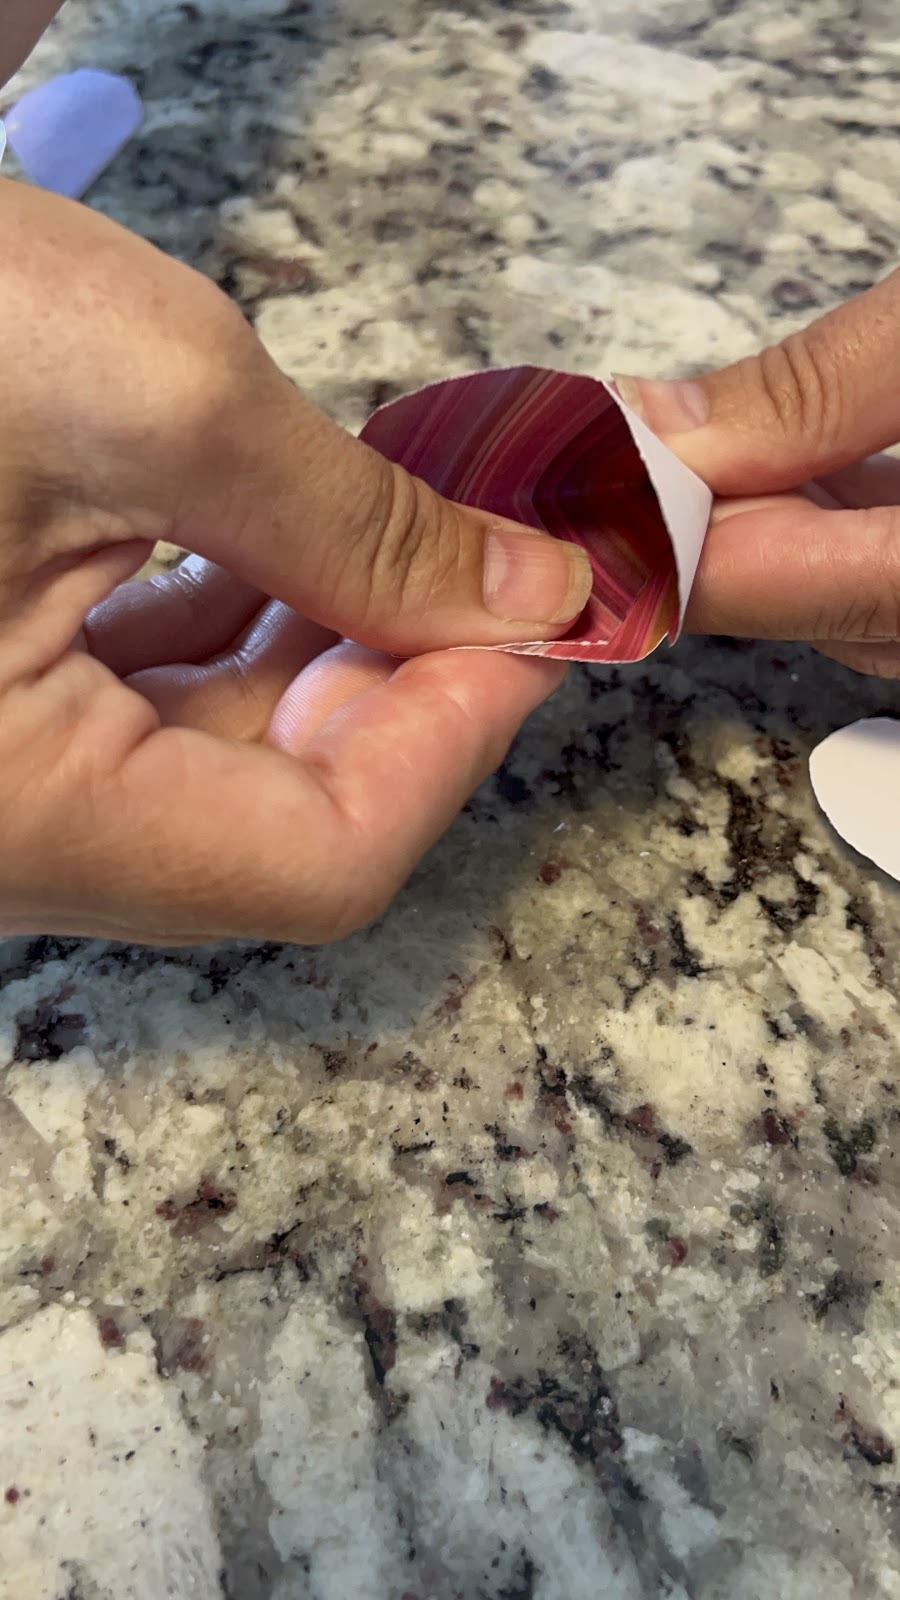
6. Prepare the Petals:
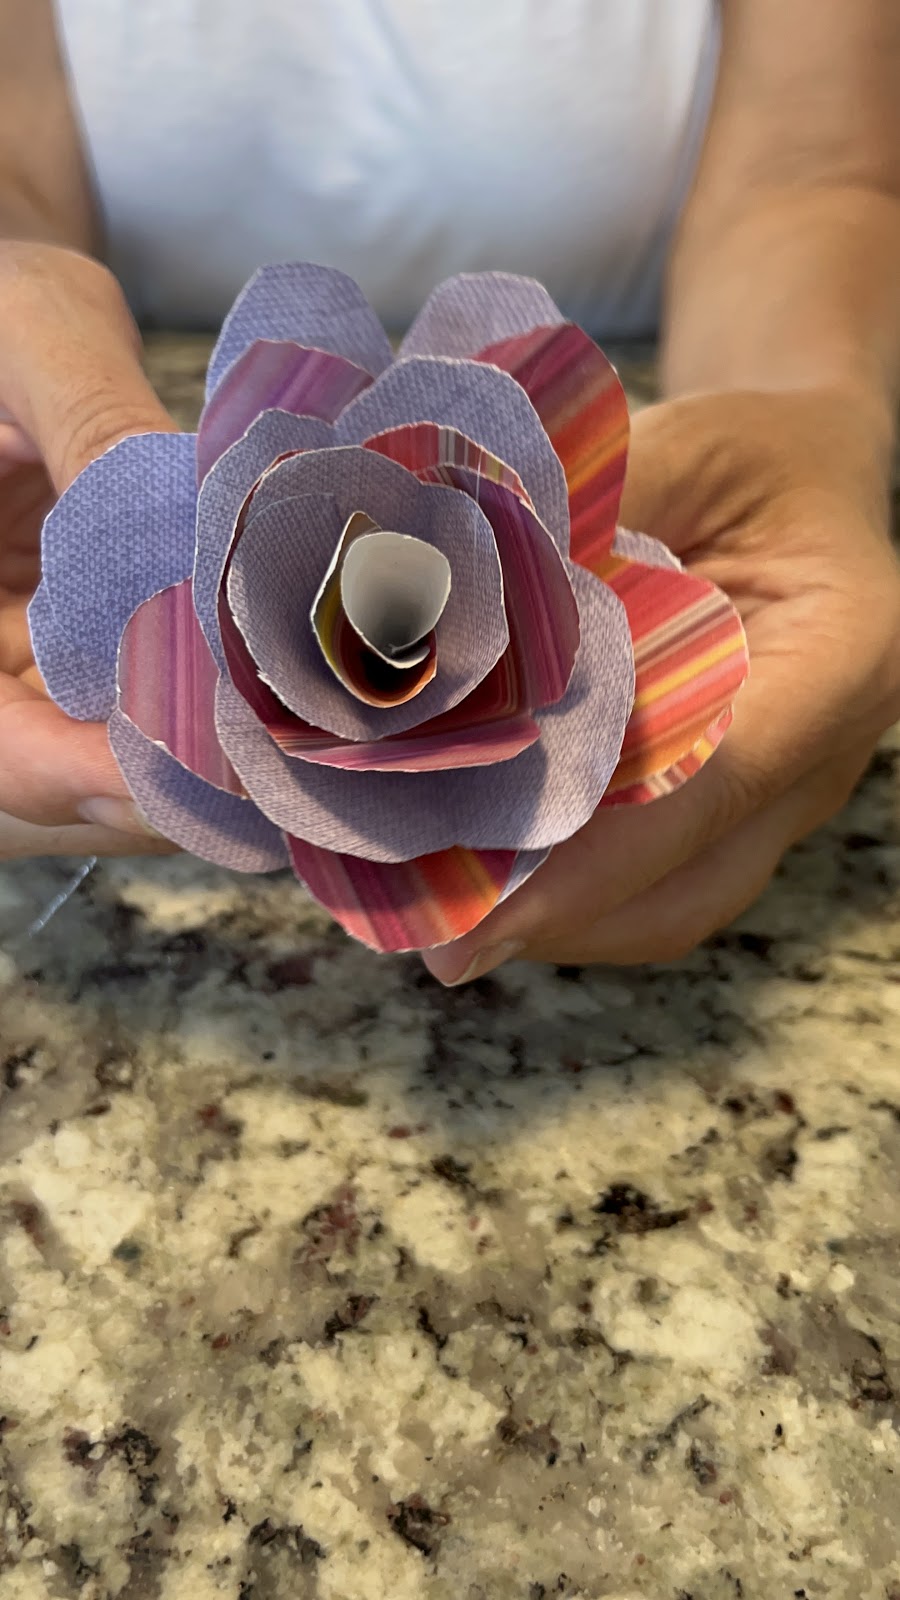
For each rose layer, take one of the seven pieces and overlap the edge petals. Glue them in place with a glue stick or other easily re-positional glue. When you are finished, each of the seven pieces should be in a gradually narrower cone shape.
When you are done forming the cone-like shapes with each petal layer, you’ll have seven layers. You’re now ready to start assembling your book page paper rose!
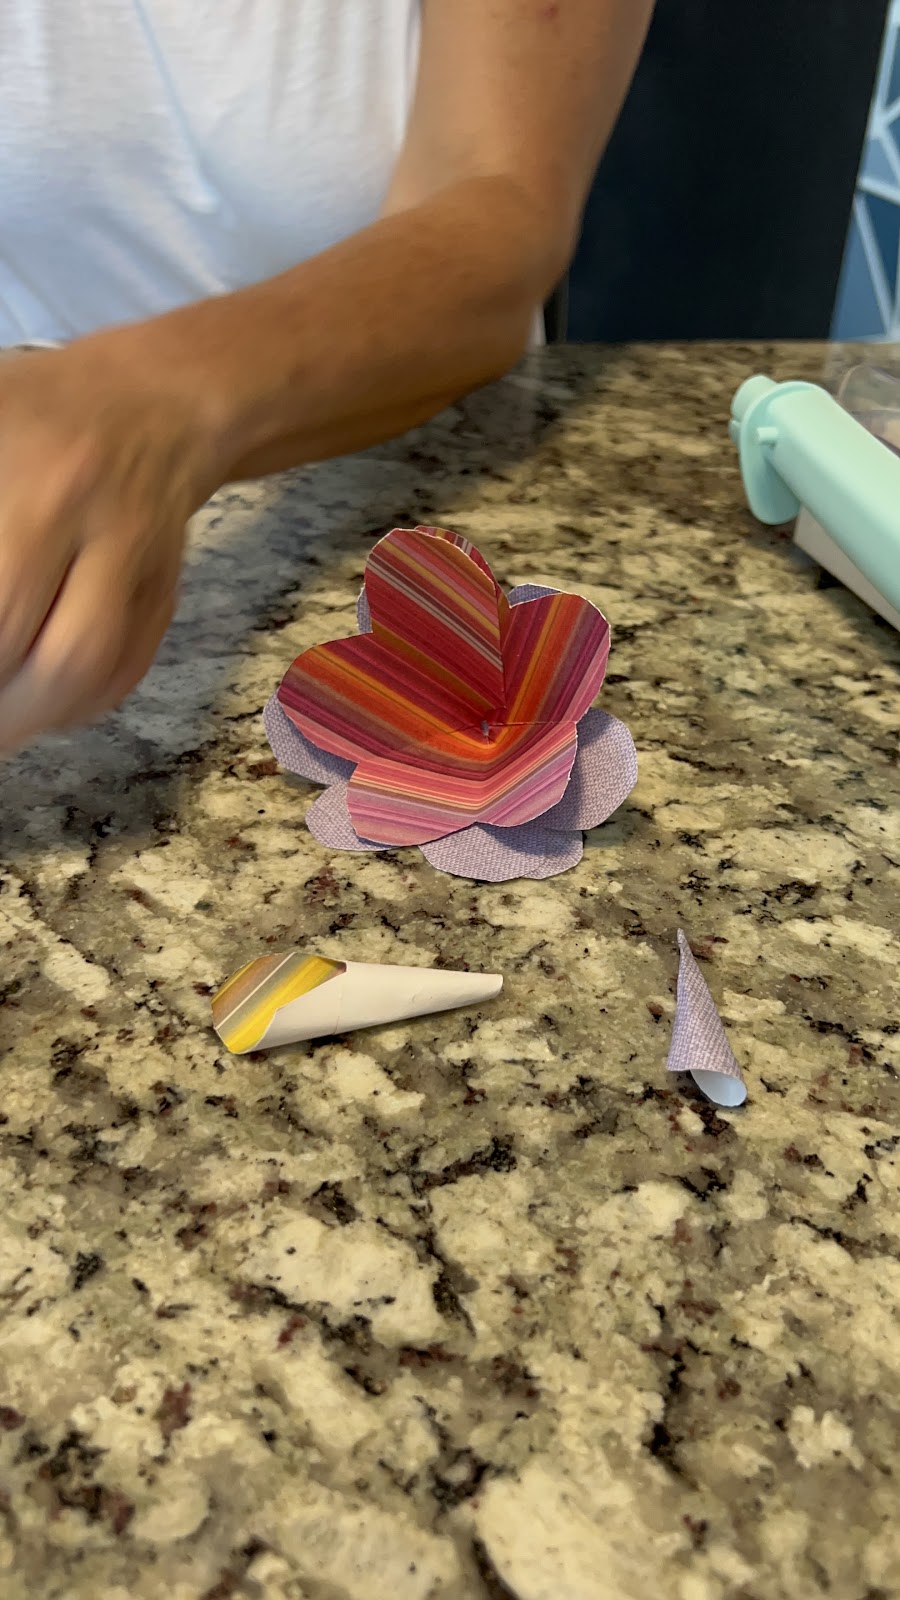
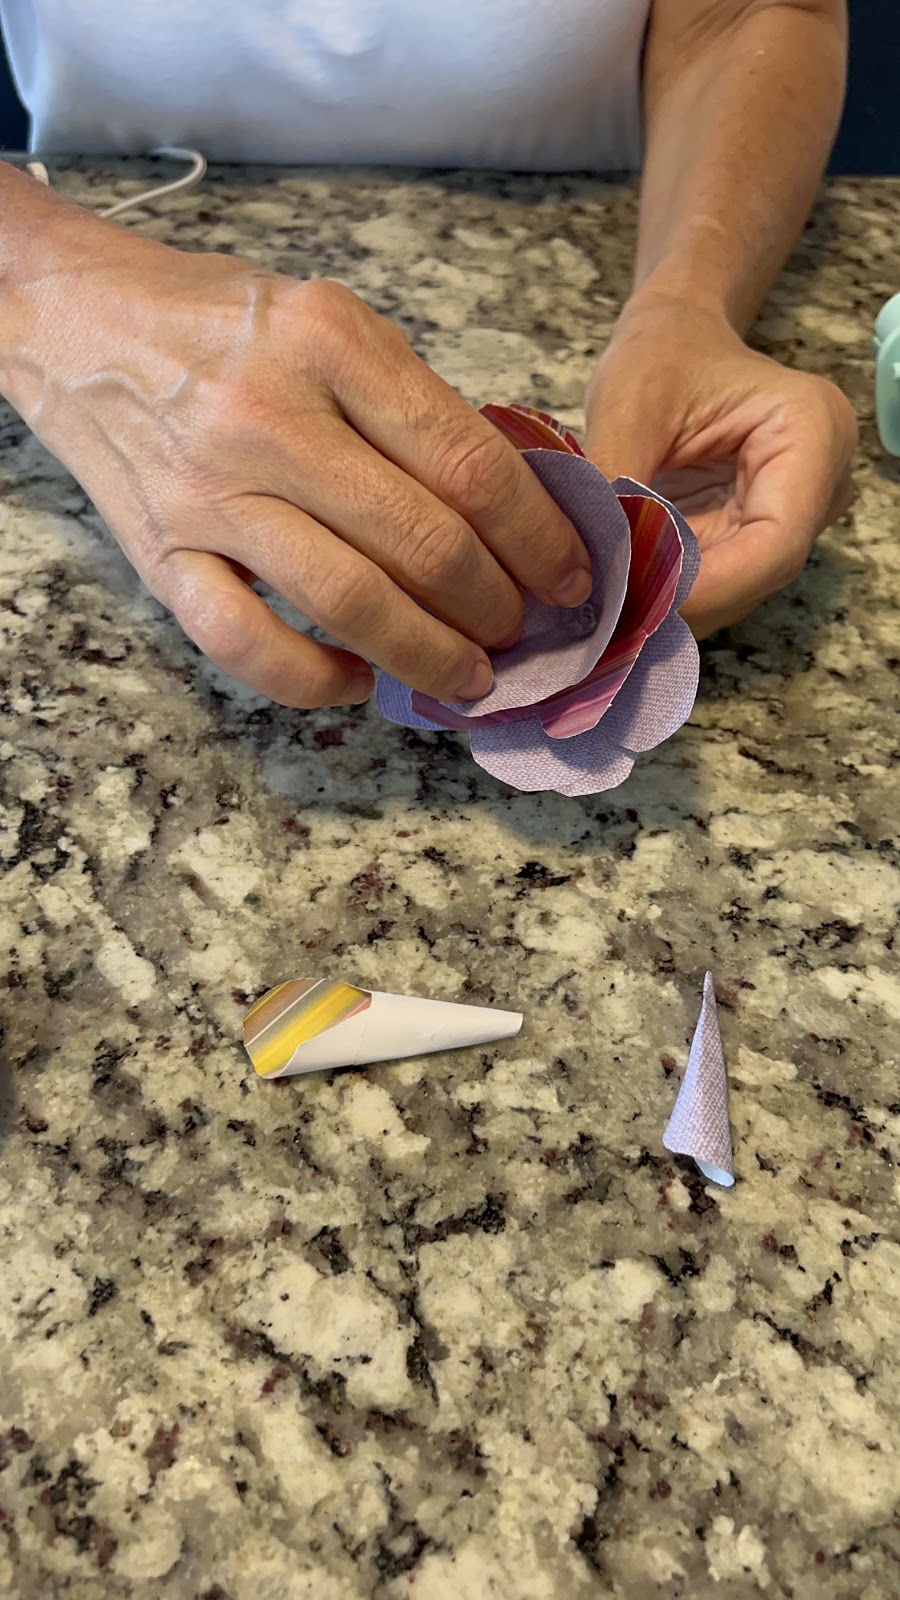
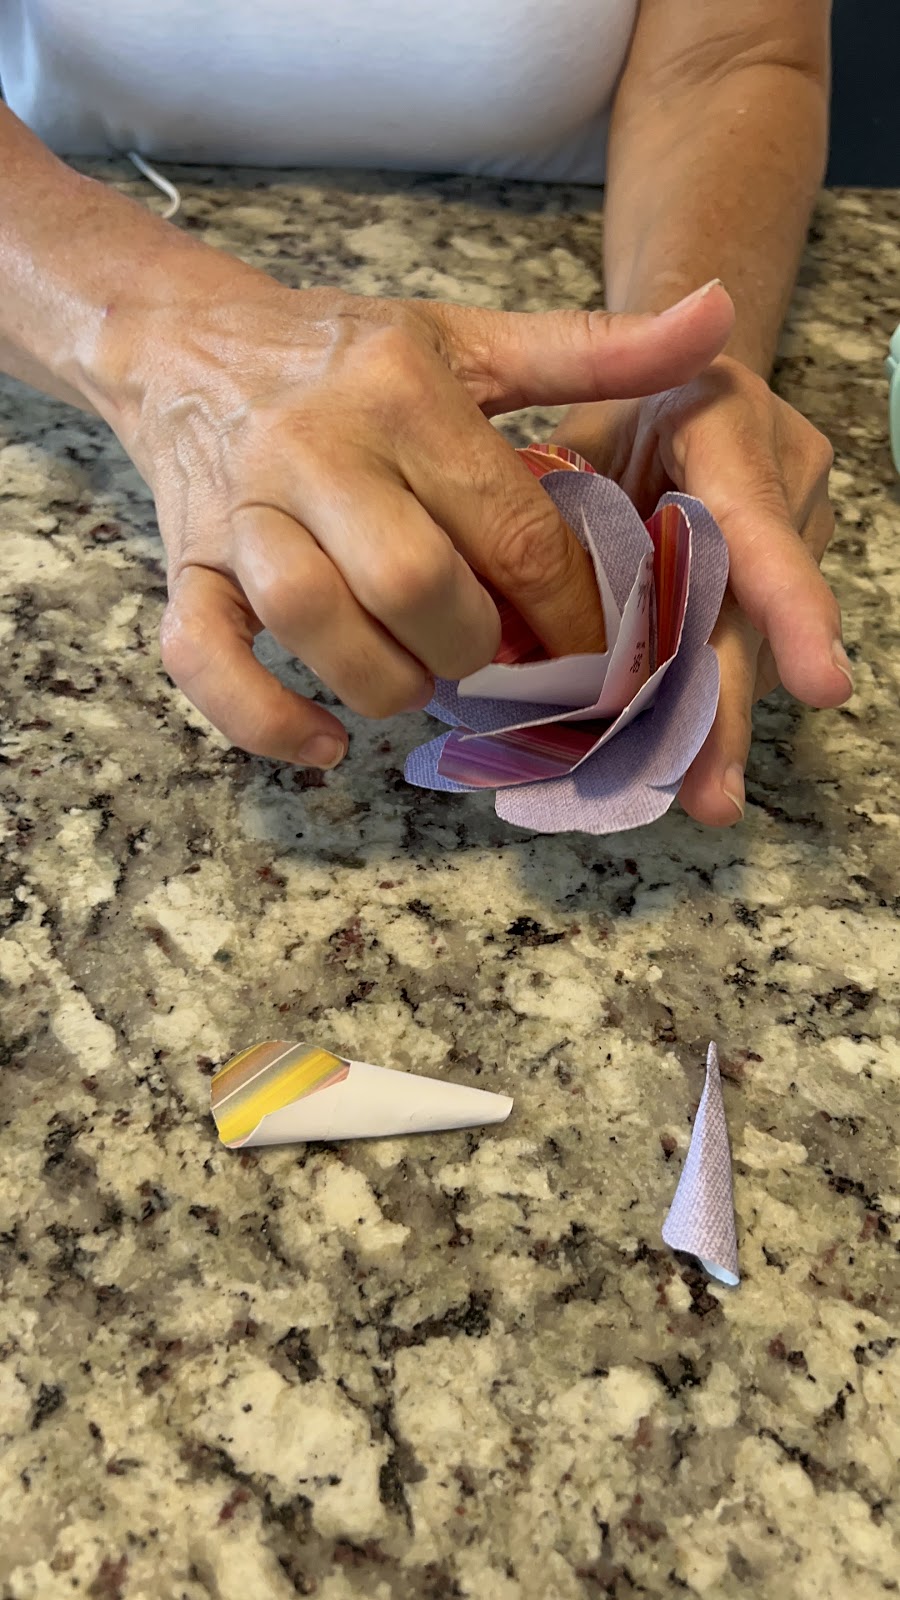
7. Assemble the Rose:
Start with the 2nd largest cone (the one with two petals missing), put some glue on its bottom (hot glue works best for this part) and insert it into the largest cone (the one with only a single petal missing). Make sure the petals are alternating (like movie theater seats).
Continue stacking and gluing the cones inside of each other until you have formed a rose shape.
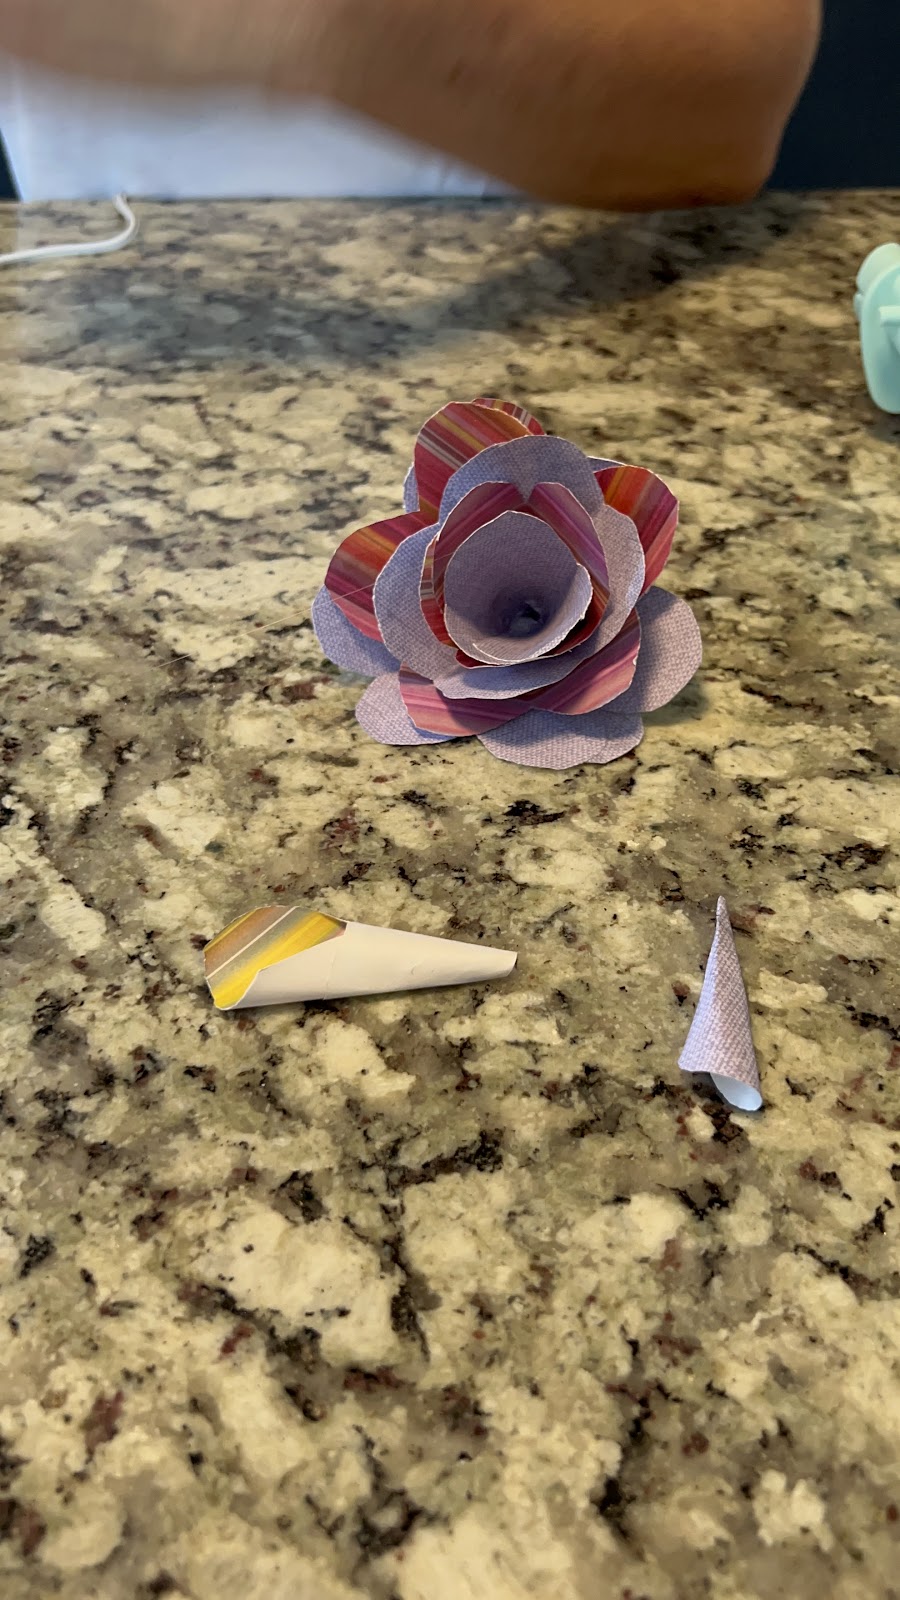
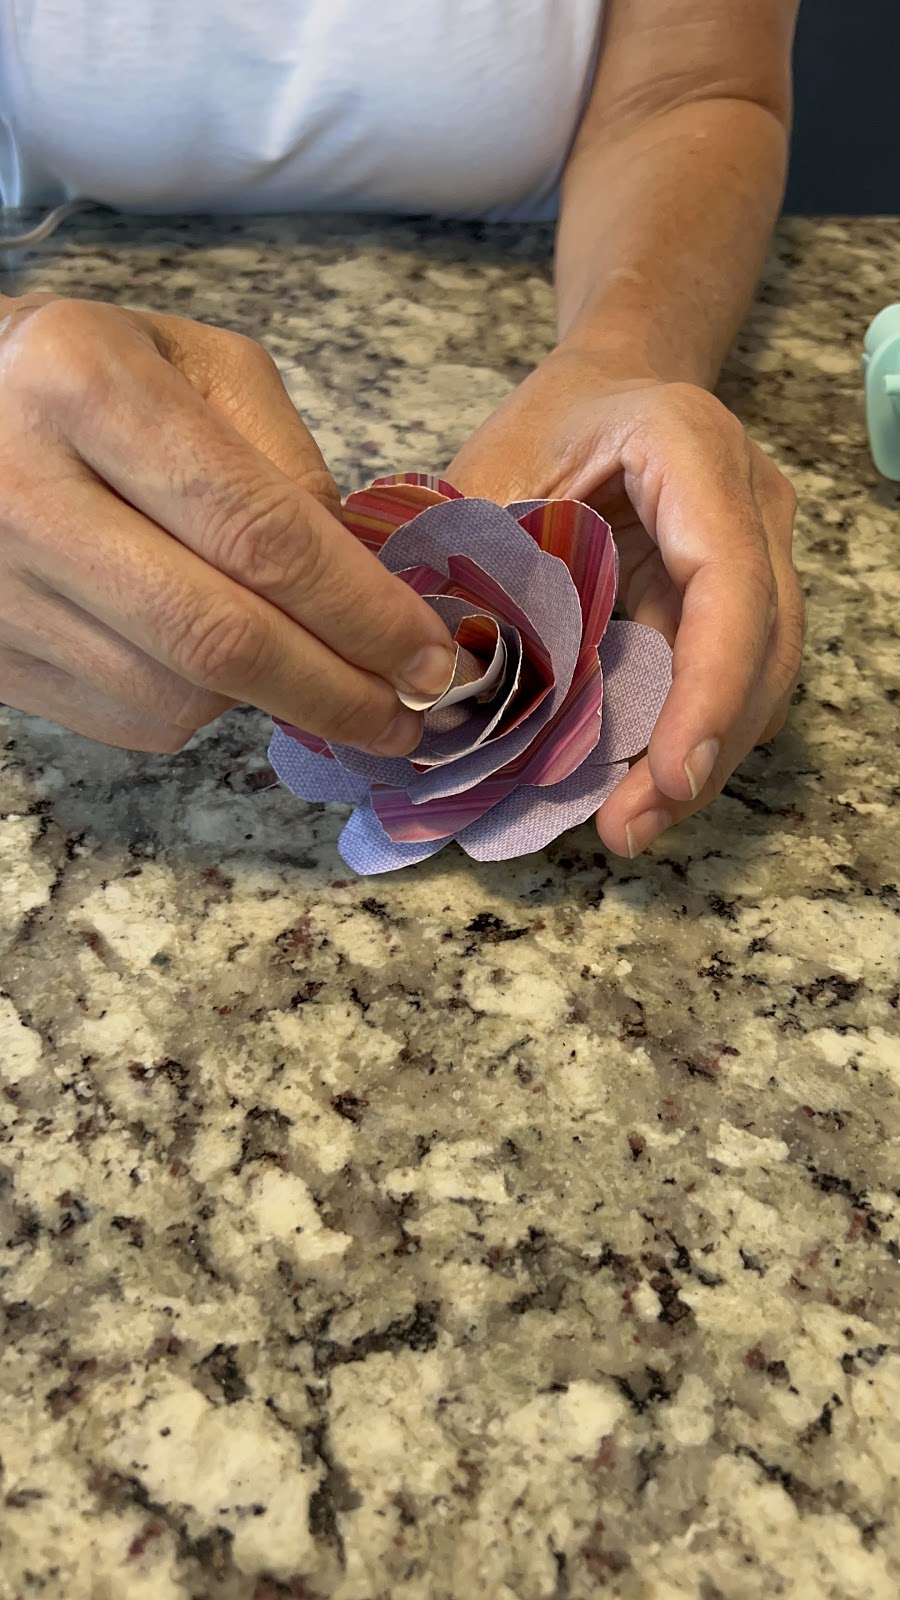
8. Final Touches:
Adjust the petals by curling the edges slightly with your fingers, a pencil, or a bbq skewer to give a more natural look.
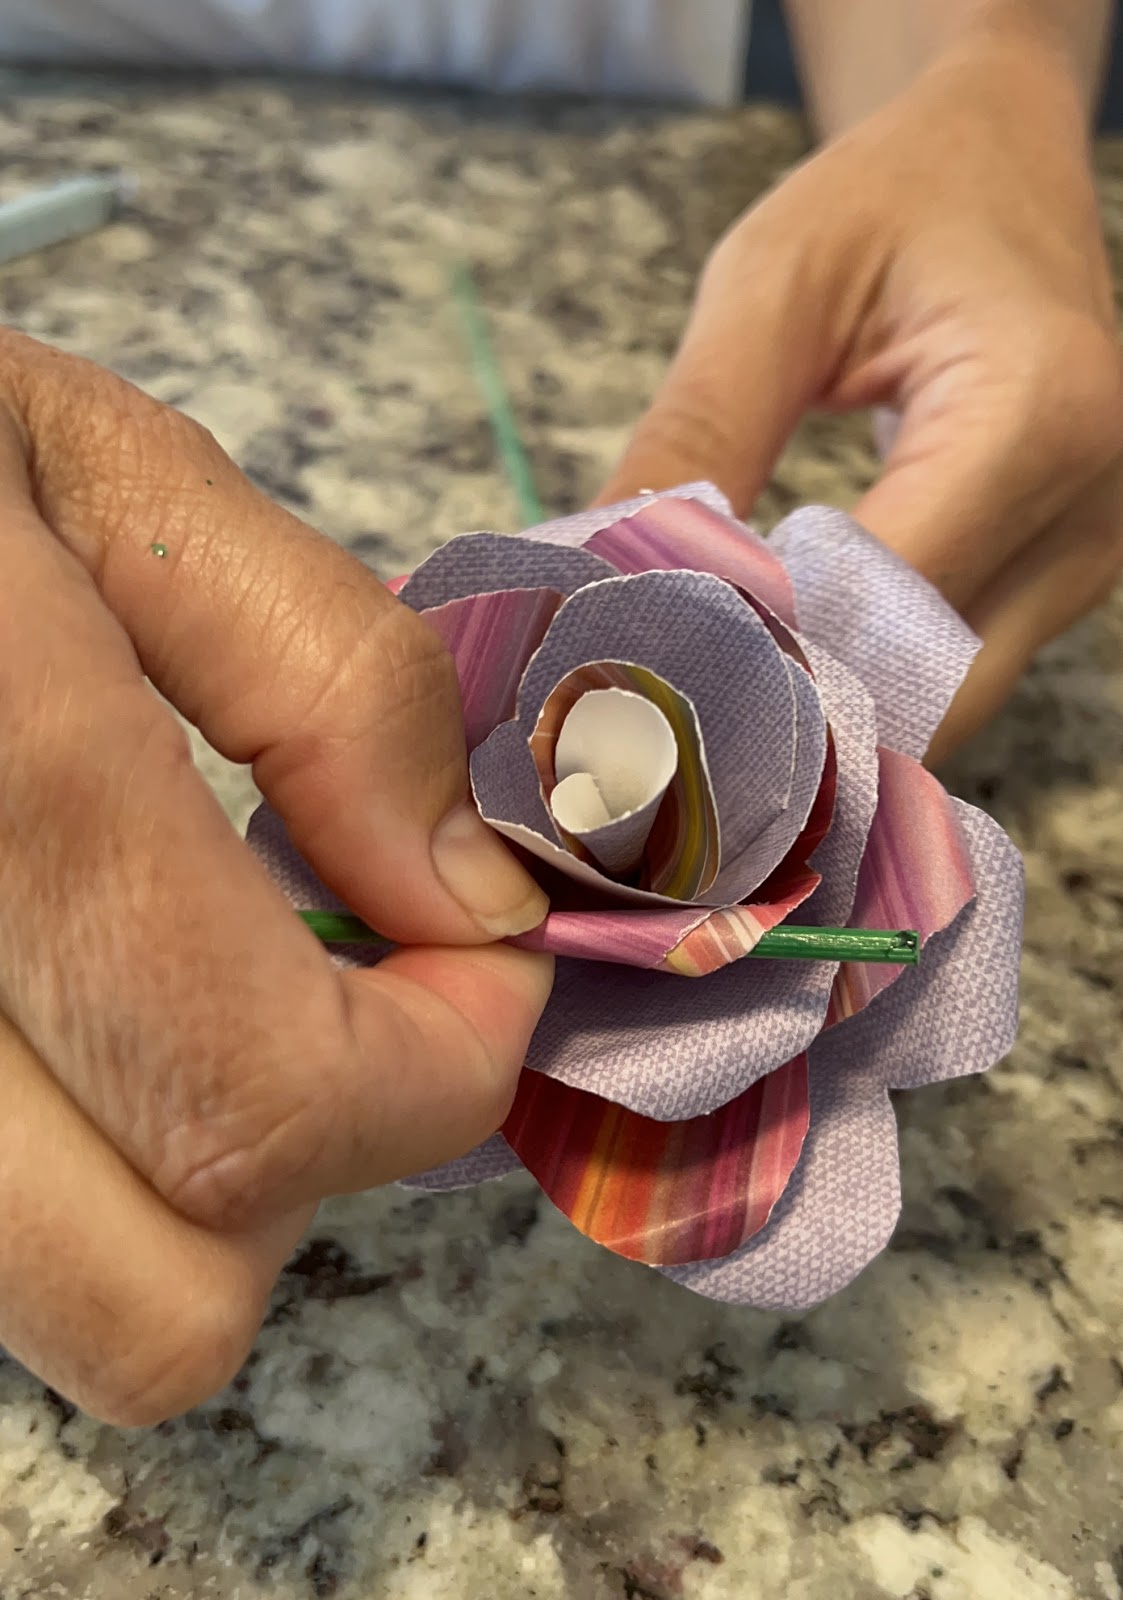
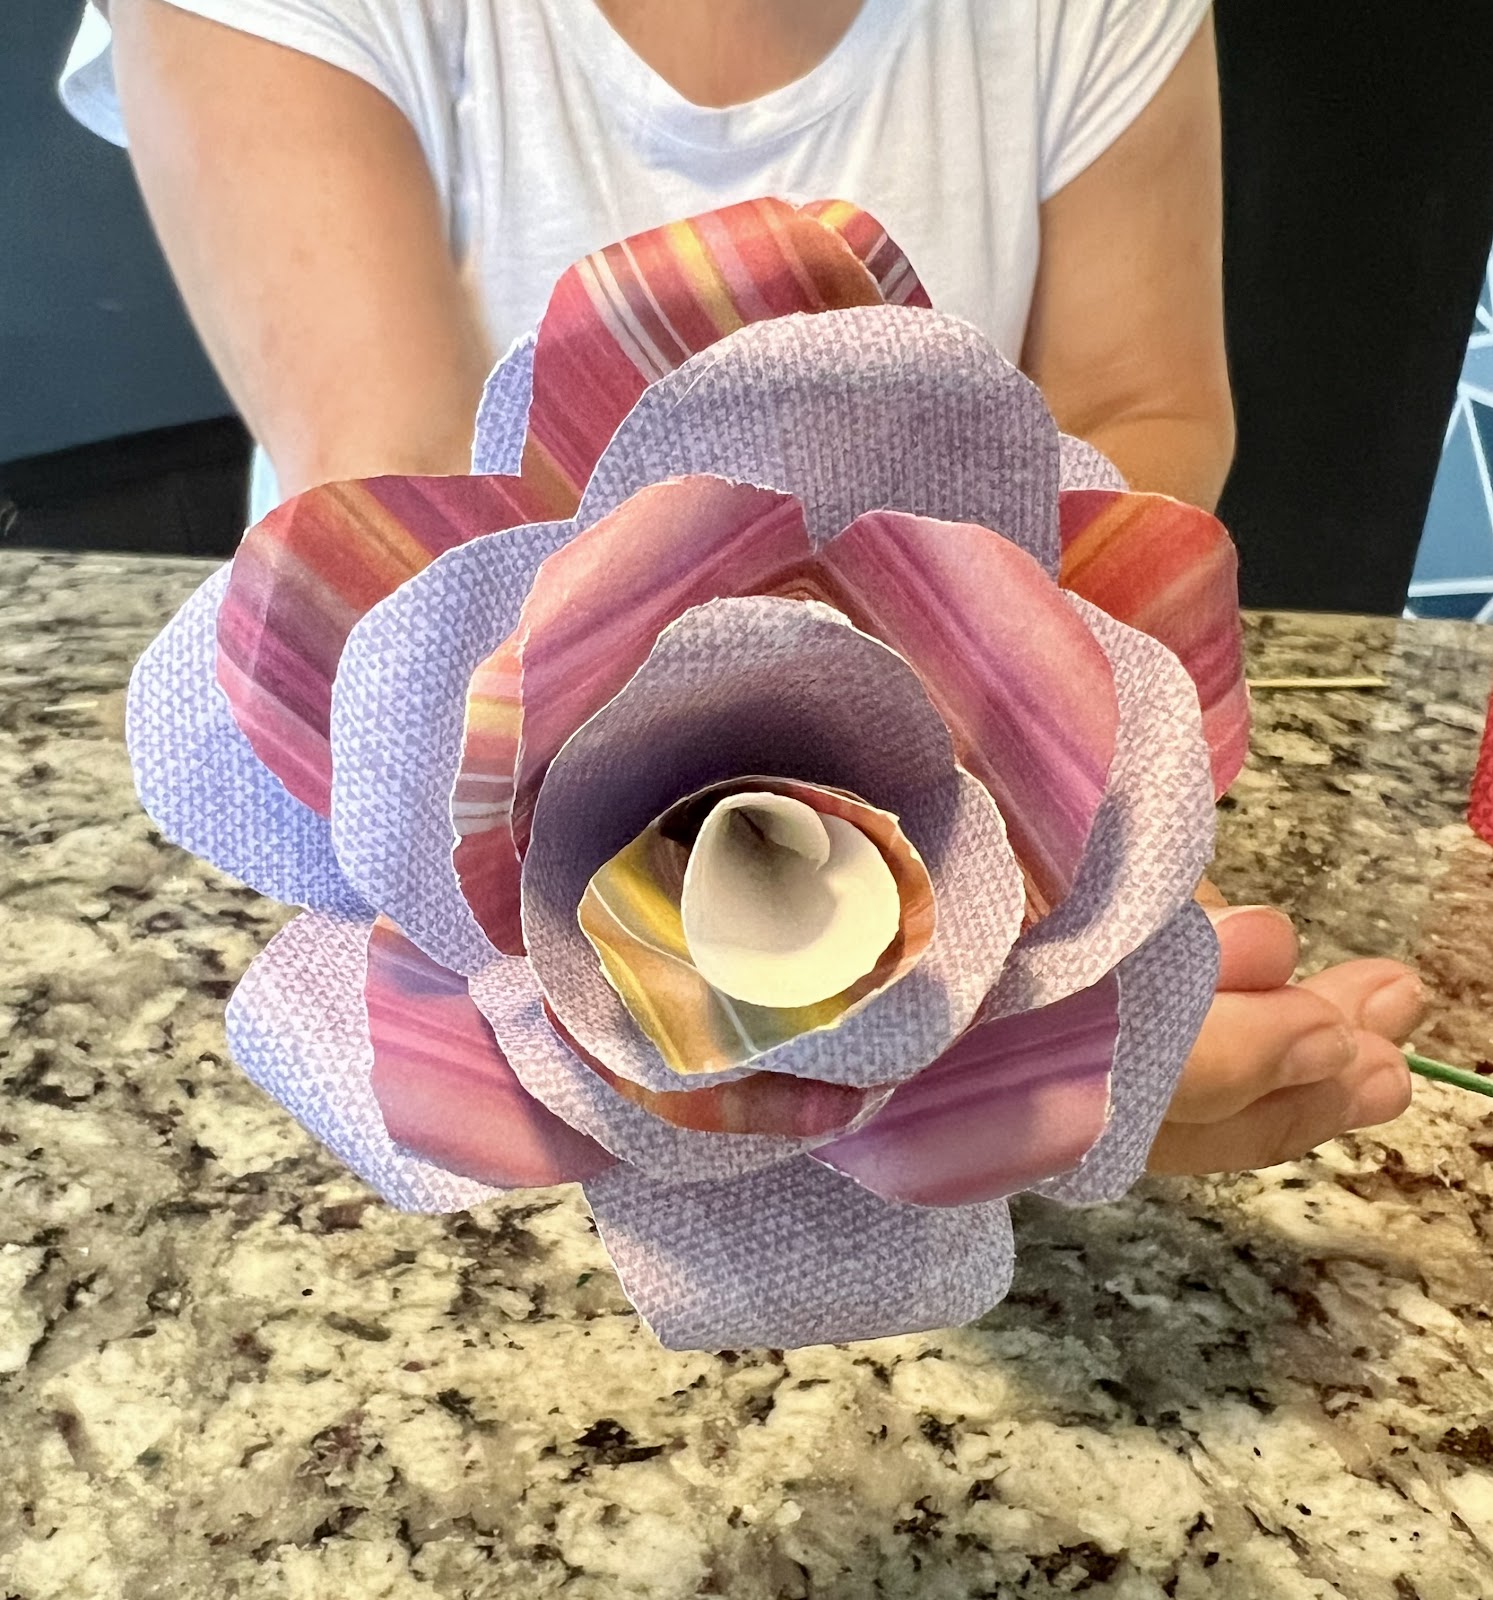
Isn’t it lovely! Optionally, you can add a stem by gluing a skewer (painted green or wrapped with floral tape) to the base of the rose. Slide the skewer into the sides, not through the center (unless you want your rose to point to the sky!). If you can’t do that, then slightly break the bbq skewer to tilt it and then wrap more floral tape around it.

This method is such an easy way to create a beautiful, layered paper rose that looks wonderful in a vase full of other paper flowers. You can use book pages, magazines, or other paper in your favorite colors! There’s really no limit to how many different looks you can achieve or how big your flowers can be!
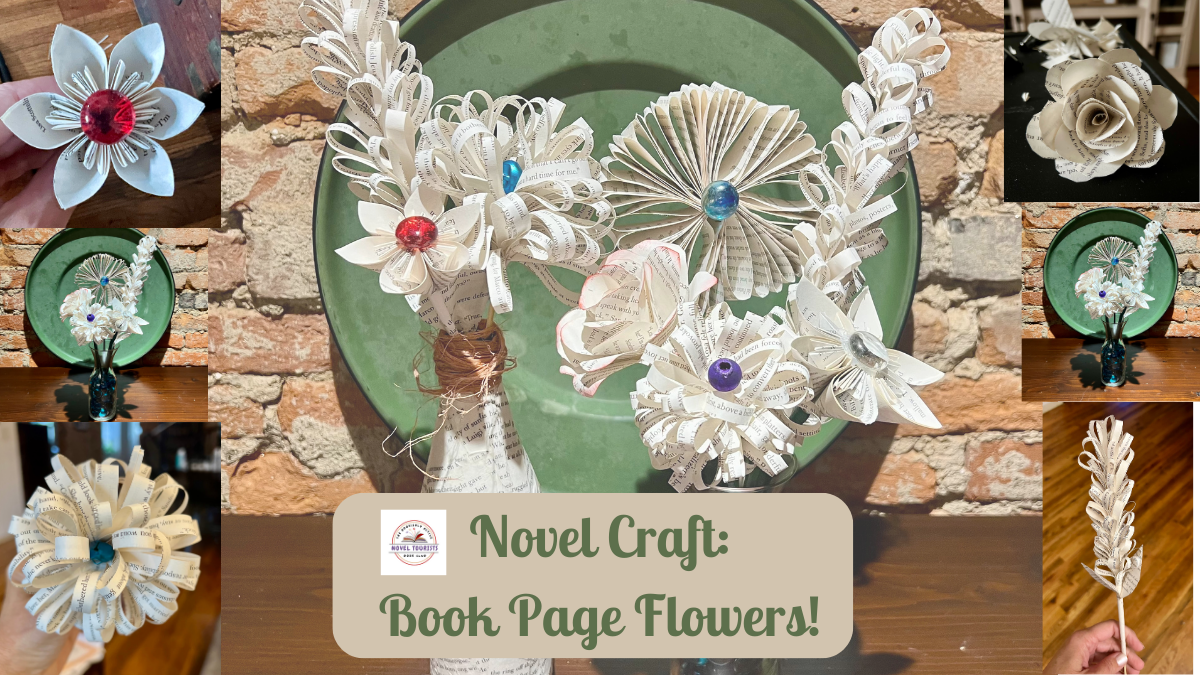
Looking for More Paper Flowers to Make with Book Pages?
Why stop with roses? Here are two more tutorial videos that will show you how to make Gladiolas, Dahlias and Daisies!